Secrets to a Flaky Gluten-Free Caramel Apple Galette
There's something uniquely comforting about the aroma of cinnamon and apples baking, a scent that instantly evokes cherished memories and the cozy embrace of autumn. For many, apple pie is the undisputed king of fall desserts. Yet, for those navigating a gluten-free diet, the dream of a perfectly flaky, non-soggy pie crust often feels like an elusive quest. Traditional gluten-free pie crusts can be notoriously problematic, prone to gumminess and lacking that coveted crisp texture. This challenge has led countless home bakers down a path of disappointment, leaving them wondering if a truly satisfying gluten-free apple dessert is even possible. We're here to tell you that it absolutely is, and the secret lies in mastering the art of the Gluten-Free Caramel Apple Galette: No More Soggy Crust.
Instead of battling the deep, enclosed structure of a traditional pie, the galette offers a brilliant, rustic alternative. This free-form, single-crust pastry sidesteps many of the issues that plague gluten-free pie shells, delivering a beautifully crisp base that perfectly complements the sweet-tart caramel apple filling. If you've been dreaming of a dessert that celebrates the rich flavors of apple and cinnamon without the gluten-induced stress, prepare to discover the transformative power of the galette.
The Galette Advantage: Your Gluten-Free Pie Solution
So, what exactly is a galette, and why is it such a game-changer for gluten-free baking? Simply put, a galette is a rustic, free-form tart. Imagine a pie that decided to be a little less formal, opting for a charmingly imperfect, open-faced design. Instead of being baked in a pie dish, the dough is rolled out, filled in the center, and then the edges are gently folded over the filling, leaving much of the fruit exposed. This "less-is-more" approach is precisely why it's a triumph for gluten-free bakers.
Traditional pies, especially those with deep fillings, trap a significant amount of steam during baking. This moisture can be disastrous for gluten-free crusts, often leading to a gummy or soggy bottom – a culinary crime in any pie lover's book. The galette's shallower filling and exposed edges allow steam to escape much more efficiently. The crust cooks quicker and more evenly, resulting in a crisp, golden base that doesn't fall victim to dreaded sogginess. There's no deep filling to weigh down the crust, and the overall structure bakes to perfection, providing that satisfying textural contrast we all crave.
Moreover, gluten-free doughs, by their nature, can be a bit more delicate and prone to cracking than their wheat-based counterparts. The beauty of a galette is that perfection isn't the goal; rustic charm is. Any small cracks or imperfections that occur during folding only add to its homemade appeal. This forgiving nature makes the galette an ideal candidate for experimenting with Rustic Gluten-Free Caramel Apple Galette: The Perfect Fall Treat, as well as other fruit fillings like berries, peaches, or plums. While not suitable for very wet or thin fillings like a savory pot pie, it's unparalleled for showcasing the natural beauty and flavor of seasonal fruits.
Mastering the Flaky Gluten-Free Crust: Butter is Key
The heart of any truly great galette is its crust. For a gluten-free version that rivals its traditional counterparts in flakiness, there are a few non-negotiable secrets.
The Power of 100% Butter
Forget shortening; for unparalleled flakiness, 100% cold butter is your best friend. Butter contains water, which turns into steam during baking, creating pockets that separate the layers of dough, resulting in that delightful flaky texture. Shortening, being pure fat, won't produce the same steam, leading to a more crumbly, mealy crust rather than a light, airy one. Always use unsalted, high-quality butter and ensure it's kept as cold as possible throughout the mixing process. Chilling your butter, and even your flour, before you begin can make a significant difference.
Hand-Working the Dough: A Gentle Touch
The second key to a flaky crust is *how* you incorporate that cold butter. The goal is to work the butter into the flour by hand, aiming for pieces about the size of a pea. When you overwork the butter, it melts and blends too thoroughly into the flour, taking on a crumbly texture rather than forming distinct pockets that will expand into flakes. Using your fingertips or a pastry blender allows for greater control than a food processor, which can quickly overmix. You should still be able to see visible flecks of butter throughout your flour mixture before adding any liquid. If your hands tend to run warm, try running them under cold water before mixing or work in short bursts.
Once the butter is incorporated, gradually add just enough ice-cold water to bring the dough together. You want it to barely hold, not be sticky or wet. Form it into a disc, wrap it tightly, and refrigerate for at least 30 minutes. This resting period allows the flour to fully hydrate and the butter to firm back up, making the dough easier to roll.
Gluten-Free Dough: Less Stress, More Flake
When working with regular wheat flour, there's a constant concern about overworking the dough, which activates gluten and leads to a tough crust. The beauty of gluten-free dough is that this worry is completely eliminated! You don't have to stress about developing gluten, giving you more freedom to handle the dough without fear of toughness. However, while you don't need to "rest the gluten," chilling the dough is still crucial for a gluten-free crust. It firms up the butter, prevents stickiness, and allows the various flours in your gluten-free blend to properly absorb moisture, resulting in a more pliable and workable dough that's less prone to tearing when rolled.
Tip: Choose a good quality gluten-free all-purpose flour blend that contains a mix of starches and binders (like xanthan gum) for best results in pastry.
Crafting the Perfect Caramel Apple Filling
With your flawless gluten-free crust ready, it's time to turn our attention to the star of the show: the rich, aromatic caramel apple filling.
Choosing Your Apples
The right apple variety is paramount for a successful apple galette. You want apples that hold their shape well during baking and offer a good balance of tartness and sweetness. Excellent choices include:
- Granny Smith: Offers a delightful tartness that cuts through the sweetness of the caramel, and they maintain their structure beautifully.
- Honeycrisp: A perfect blend of sweet and tart with a firm texture, making them ideal for baking.
- Braeburn: Slightly tart with a crisp texture, they hold up well and contribute a complex flavor.
- Fuji or Gala: Can be used, though they are sweeter and a bit softer. Consider blending them with a tart apple like Granny Smith for balance.
Avoid apples that turn to mush, like Red Delicious. Peel, core, and slice your chosen apples thinly and uniformly to ensure even cooking. Toss them with a touch of sugar (adjusting based on apple sweetness), a generous amount of cinnamon, a pinch of nutmeg, and maybe a squeeze of lemon juice to brighten the flavors and prevent browning.
The Allure of Caramel
The "caramel" in our Rustic Gluten-Free Caramel Apple Galette: The Perfect Fall Treat adds a layer of luxurious depth. You can achieve this in a few ways: either by drizzling a rich homemade or store-bought caramel sauce over the apples before folding the crust, or by adding a few dollops of a firm caramel mixture directly into the apple filling. The heat of the oven will melt and mingle the caramel with the apples and their juices, creating a sticky, sweet glaze that's simply irresistible. A hint of vanilla extract or a dash of sea salt in your caramel can elevate the flavor profile even further.
Assembling Your Rustic Masterpiece
Now for the fun part – bringing your gluten-free caramel apple galette to life!
Embrace Imperfection
On a lightly floured surface (using gluten-free flour), roll out your chilled dough to about 1/8-inch thickness, aiming for a rough circle. Don't worry if it's not perfectly round; remember, rustic is the goal. Carefully transfer the rolled dough to a parchment-lined baking sheet. Pile your prepared caramel apple filling into the center of the dough, leaving a generous 4-5 inch border of dough around the edges. Then, gently fold the dough border up and over the outer edge of the filling, pleating it as you go. As mentioned, gluten-free dough might crack a little, but don't fret! Just gently press the cracks back together. This is where the galette's charm truly shines through.
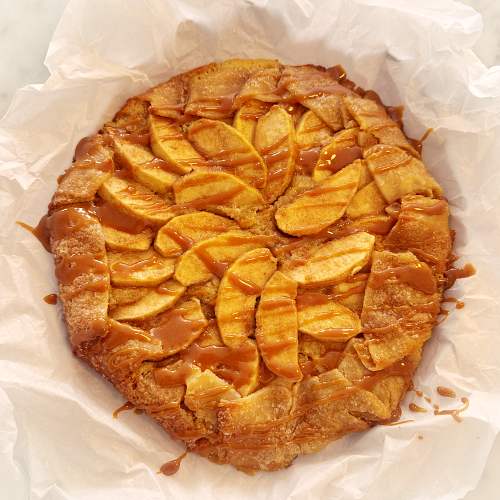
The Caramel Drizzle: A Finishing Touch
Once folded, brush the exposed crust with an egg wash (one egg yolk whisked with a tablespoon of water or milk) for a beautiful golden sheen, and sprinkle with coarse sugar for added sparkle and crunch. If you prefer to add your caramel after baking, this is the time to prepare it. As the galette bakes, the apples soften, their juices bubble, and the crust turns golden brown and irresistibly flaky. Once out of the oven, allow it to cool slightly before drizzling generously with warm caramel sauce. Not only does this add another layer of indulgent flavor, but that luscious caramel also beautifully camouflages any tiny flaws in your rustic crust, making every galette a visual and culinary delight.
Conclusion
Say goodbye to the frustrations of gummy, soggy gluten-free pie crusts and embrace the effortless elegance of the galette. This Gluten-Free Caramel Apple Galette: No More Soggy Crust offers the perfect solution, delivering a delightfully flaky crust that perfectly cradles a warm, sweet-tart caramel apple filling. By understanding the simple secrets – 100% cold butter, a gentle hand, and the galette's unique free-form structure – you can confidently create a show-stopping dessert that will impress everyone, gluten-free or not. It’s a testament that delicious, flaky, and beautiful gluten-free baking is not just possible, but incredibly rewarding. So, preheat your oven, gather your ingredients, and prepare to bake the most satisfying and rustic Rustic Gluten-Free Caramel Apple Galette: The Perfect Fall Treat you've ever tasted.
